Reviewing My First 50 Houou Games With Naga

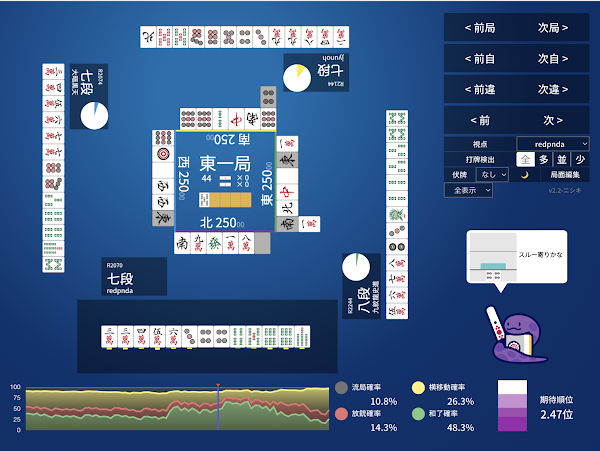
My Naga Stats (50 games)
Naga Stats Don't Matter?
When you feed a game log into the Naga AI, it gives you 3 summary metrics:
match%, Naga rating, and bad move%. The match% is how many of Naga's moves you
match exactly. The Naga rating gives you 100% credit for matched moves, and
partial credit for moves that it considers but aren't the top choice. The bad
move% penalizes every move that Naga does not consider making.

When we win or deal in, this greatly affects our placement in a match. Therefore, it is really important to play well when winning or dealing in are likely. We also care about hands that are very valuable - making a mistake in an 8K hand is much worse than making the same mistake in a 1K hand.
In the rest of this post, I will be using Naga to analyze my biggest and most common mistakes, filtered by the above criteria.
 We're 1-shanten for a riichi hand. Cutting 1m for tanyao and reverting to 2-shanten should be the standard play for a non-dealer, since we're hesitant to declare bad wait riichi with no dora. We should definitely declare bad wait riichi as the dealer, so I decided to keep 1-shanten, but Naga makes no exception for the dealer. To better understand this decision, I want to look at a few modified positions. As the reader, try answering these questions before looking at the answers.
Naga Answers:
Naga calls 3p, progressing the 2-shanten tanyao hand to a strong kutsuki 1-shanten. For the dora 1 case, Naga cuts 1m in South 2, and 3s in East 2. The confidence bars are very close in both scenarios. This suggests that Naga thinks the 1-shanten hand has slightly higher EV, but in South 2, Naga is more concerned about bad wait riichi and dropping position. For the dora 2 case, Naga cuts 3s in East 2 and South 2, but the decision is still close in the South 2 scenario. We have another 1-shanten hand with 3 dora, and are deciding between cutting the 1m pair and the 13p kanchan. Both options have the same tile acceptance to tenpai. If no 1m are dropped before we reach tenpai, the shanpon wait will have the higher winrate. Comparing cutting 1m vs 1p, both options keep the (callable) 4p tanyao upgrade for ryanmen x2 1-shanten. However, some tanyao upgrades get worse if we cut 1p. If we draw 3p, 5p, or 6p, we would like to keep the 1p for some complex shapes: 133456p, 135p, and 133345p.
 For this section, I'm going to be referencing a chart from this book. Thanks to hue on discord for the translation. With perfect 1-shanten, dora 2, and pinfu chance, on East 1 with 30-10 uma, the chart has calling as +.5 EV over pass on turn 10, and -1.3 EV on turn 7. Interpolating these numbers to turns 8 and 9, we should make this call around turn 10 and pass earlier. For the ryanmen x 2 case, we can call starting on turn 8.
 Here's a variation where the 25p ryanmen only accepts 4 outs if we pass, but calling gives us a shanpon wait instead of a ryanmen wait. The acceptance is similar to a ryanmen + ryankan 1-shanten. In this analogy, the 78m is the ryanmen. The 4 out 25p wait combined with the 4 out 8m / 3p shanpon form the ryankan. For the closed version, roughly a quarter of the accepted tiles lead to a good wait, and the rest lead to a bad wait (the 4 out 25p).
In the chart, looking at the column for dora 2 ryanmen + ryankan 1-shanten calling the ryanmen, calling is -.3EV on turn 10 and +1.6EV on turn 13. We can call around turn 11 or so. Compared to the last problem, we should be a little more hesitant to call into a bad wait. This situation is similar to the last one in that we would be calling into a bad wait. There is no pinfu in this hand, but the hand has iipeikou and dora acceptance if we pass. Although there are some differences, the turn 11 threshold from the previous screenshot would be a good estimate, so we can call this on turn 12.
Average Match Rate/Bad Move Rate by Tenhou Rank (2020 data)
Good metrics are correlated with mahjong performance, but they can be
misleading. For example, in its last 100 games, the 9-10 Dan AI Suphx had a match% of 74.4, an
average Naga Rating of 86.3, and a bad move rate of 7.1%, stats comparable to the average 7 dan in 2020. Tencent's new AI LuckyJ hit 10 Dan with bad move rates of >10% in many games. The main reason Naga rating is imperfect is because Naga assigns probabilities to moves, when we really care about expected values (EV). Instead of trying to optimize these stats, I'd rather focus on fixing the decisions I regret the most.
Regret
When I analyze my games, I focus on the decisions that I regret the most. In hindsight, compared to a better line of play, how much did my bad decision hurt my EV? In my opinion, the most important decisions (and mistakes) of any mahjong game occur in the following positions:
- push/fold decisions
- tenpai hands
- 1-shanten hands
- hands with 2+ dora
- optimal folding
Tanyao Upgrades

- Suppose we cut 1m. Should we call 3p if it is cut next turn?
- 6s is now dora. What tile do we cut?
- 6s is now dora, and we swap 5p for the red dora. What should we cut?
- For the last two questions, suppose the scores are the same, but it's East 2 instead of South 2. Do any of your answers change?
Naga Answers:
Naga calls 3p, progressing the 2-shanten tanyao hand to a strong kutsuki 1-shanten. For the dora 1 case, Naga cuts 1m in South 2, and 3s in East 2. The confidence bars are very close in both scenarios. This suggests that Naga thinks the 1-shanten hand has slightly higher EV, but in South 2, Naga is more concerned about bad wait riichi and dropping position. For the dora 2 case, Naga cuts 3s in East 2 and South 2, but the decision is still close in the South 2 scenario.

Dora 2 Tenpai Calls


In the chart, looking at the column for dora 2 ryanmen + ryankan 1-shanten calling the ryanmen, calling is -.3EV on turn 10 and +1.6EV on turn 13. We can call around turn 11 or so. Compared to the last problem, we should be a little more hesitant to call into a bad wait.

Row 3 2-Tile Mawashi
Mawashi is a term that suggests balancing offense and defense. As we'll see in the following screenshots, Naga sometimes considers this technique when there are two safe tiles in a block that can be safely discarded while maintaning winning chances.
 The player on the left declares riichi, and we're tenpai for a strong 7700+ pt hand as the dealer. Unfortunately, our wait only has 2 outs, so we're unlikely to win. After this turn, there would be 3 more tiles we would need to push to collect the exhaustive draw payments. Pushing for these payments with even a bad wait 1 han hand is generally higher EV than folding, but what about mawashi? We could cut the safe 12p, keeping the chance of drawing or calling 3p, 6p, 9p, or 2s to get back to tenpai. Because the player on the left declared riichi, this increases the chance of getting some of these calls. Naga thinks mawashi is the best EV move here.
Now consider the variation where our wait has 3 outs instead of 2 outs. Should we push, or cut 12p? With this modification, our winrate went up enough that Naga would rather push 3p to keep the chance of winning 7700+ pts. As the dealer in the last round of the game, if we can hit tenpai upon draw, we can guarantee 1st place. After this round, we get 4 more draws to try and hit tenpai. We can go for the most efficient cut, 2s, and then cut a dangerous 4s or 6s upon reaching tenpai, or cut the west pair, which could potentially get us to tenpai without taking any risk.
Naga decides to take the safe route. Even if we miss tenpai, if 0-1 other players are tenpai, we can still confirm 1st. After cutting 2s and drawing 7s next turn, Naga wants to fold the west anyways. Naga doesn't think it is worth pushing a dangerous tile from 1-shanten. If we're going to cut west on a dangerous draw anyways, we might as well do so now. If we draw a dangerous tile, we would cut the second west and only push the dangerous tile if we hit tenpai. For the chiitoi hands, I ran the standard Naga model alongside the aggressive Naga model which calls more, and has a similar level of skill. The gray call line is the aggressive Naga decision.
Here we can consider passing for a 1-shanten chiitoi hand, or calling for a 1-shanten toitoi hand. Before honba, the toitoi hand is worth 2600 pts, while the riichi + chiitoi hand is worth 3200 pts, plus any additional points from tsumo, ura, or ippatsu. I think the calling winrate is significantly higher with 2 terminal pairs and the 5p pair being cut off by the 6p call (In my experience, the latter is a factor Naga usually ignores / misses).
At a first glance calling seems better, but I underestimated how strong the riichi + chiitoi hand is. I'm going to ignore ura chance for this rough estimate of the closed hand EV. Conditional on a win, with a tsumo rate of 30% (Statistical Mahjong Strategy Bad Wait Stats), and an ura rate of 16% , I estimate the value of the closed hand to be 5K. It's pretty early into the round too, making the slower path a stronger candidate.
Still, the increased winrate from calling is inherently valuable for reducing tsumo loss and preventing my opponents from winning, so I'm not completely sure Naga is correct here. In the bottom right, the winrate estimate is 23% before calling and 20% after. It is possible that Naga is misevaluating the probability 5p comes out, but this is just speculation. As a disclaimer we should take the estimates in the bottom right as a grain of salt, since they often contradict Naga's actual decisons and simulation results. With that said, I think passing is probably the correct play here. For this hand, calling would be giving up the 1-shanten chiitoi for a 2-shanten tanyao hand, which is confirmed 7700+ pts. The open hand is decently fast, with a live looking 2m pair and an overlapping ryanmen shape. With such a valuable hand, the goal should be be to maximize winrate.
Naga thinks the winrate before the call is around 20%, but only 13% after the call. Probably reverting shanten on turn 10 is too late, and the red five call may make it harder to call our other tiles.
Out of all the mistakes in this post, these are the ones I regret the most. I made this mistake at least 5 times in the past 2 months, and I've seen many strong players make this mistake. It is a very unintuitive and tricky one to spot.

In the above chart, note that half suji 5 and 1 have the same overall dealin. However, in the one chance row, the half suji dealin is 4.4% vs 6.1% for 1. In the 2x2 chance row, the half suji dealin is 5.5% compared to 7.5% for the 1. Why does this happen? For a terminal tile, a player may be waiting with a tanki, shanpon, or ryanmen wait. With a middle half suji tile, it is less common to be waiting with a tanki, kanchan, or shanpon wait, so most waits will be ryanmen. Therefore, blockers such as 1 chance or 2x2 chance are more effective at reducing the dealin rate of a half suji tile compared to a terminal tile. Let's look at the main candidates. We have suji 9p, but it is dora, increasing dealin chance and dealin value. 5s is half suji since 8s was cut after the left player's riichi. 5s has 3 blockers for the 25s wait. 4p isn't quite half suji, but it is close. On the 47 side, it is double one chance. On the 14p side, it is 2x2 chance. 4p and 5s are both sotogawa to the player across from us, who cut 56p and 4s early on. We have 2 4p and 3 5s, which can allow us to fold for multiple turns, a benefit over the single 9p. In the end, the best choice according to Naga is the (almost) half suji 4p. It is the number of blockers on the less protected side that makes it better than 5s.
 Same as the last screenshot, but now 5s is one chance on the 25s side. This changes the decision to 5s.
 Our candidates here are 8m, 4p, and 4s. 8m is 1 chance and late sotogawa to one player. 4p is suji to one player and half suji + 1 chance vs the other player. Unfortunately, the one 5p not seen is the red five. 4s is suji to one player and half suji to the other player, with 2 blockers. In this spot, it seems like the two 4s guaranteeing safety for the rest of the game makes it the optimal choice.

Now consider the variation where our wait has 3 outs instead of 2 outs. Should we push, or cut 12p? With this modification, our winrate went up enough that Naga would rather push 3p to keep the chance of winning 7700+ pts.

Naga decides to take the safe route. Even if we miss tenpai, if 0-1 other players are tenpai, we can still confirm 1st. After cutting 2s and drawing 7s next turn, Naga wants to fold the west anyways. Naga doesn't think it is worth pushing a dangerous tile from 1-shanten. If we're going to cut west on a dangerous draw anyways, we might as well do so now. If we draw a dangerous tile, we would cut the second west and only push the dangerous tile if we hit tenpai.
5 Pair Chiitoi Calls

Here we can consider passing for a 1-shanten chiitoi hand, or calling for a 1-shanten toitoi hand. Before honba, the toitoi hand is worth 2600 pts, while the riichi + chiitoi hand is worth 3200 pts, plus any additional points from tsumo, ura, or ippatsu. I think the calling winrate is significantly higher with 2 terminal pairs and the 5p pair being cut off by the 6p call (In my experience, the latter is a factor Naga usually ignores / misses).
At a first glance calling seems better, but I underestimated how strong the riichi + chiitoi hand is. I'm going to ignore ura chance for this rough estimate of the closed hand EV. Conditional on a win, with a tsumo rate of 30% (Statistical Mahjong Strategy Bad Wait Stats), and an ura rate of 16% , I estimate the value of the closed hand to be 5K. It's pretty early into the round too, making the slower path a stronger candidate.
Still, the increased winrate from calling is inherently valuable for reducing tsumo loss and preventing my opponents from winning, so I'm not completely sure Naga is correct here. In the bottom right, the winrate estimate is 23% before calling and 20% after. It is possible that Naga is misevaluating the probability 5p comes out, but this is just speculation. As a disclaimer we should take the estimates in the bottom right as a grain of salt, since they often contradict Naga's actual decisons and simulation results. With that said, I think passing is probably the correct play here.

Naga thinks the winrate before the call is around 20%, but only 13% after the call. Probably reverting shanten on turn 10 is too late, and the red five call may make it harder to call our other tiles.
Half Suji With Blockers

Turn 9 Dealin Rates - Statistical Mahjong Strategy By Miinin
Let's start with some basics. A 4 is half suji to a player if 1 (half suji A) or 7 (half suji B) is in their discards, but not both. Half suji tiles are similar to 1/9 tiles in terms of safety. However, in many cases, half suji tiles are even safer than 1/9 tiles. A one chance half suji tile is in between suji 2 and suji 3 in terms of safety. A 2x2 chance half suji tile is similar to a suji 3 in terms of safety.
In the above chart, note that half suji 5 and 1 have the same overall dealin. However, in the one chance row, the half suji dealin is 4.4% vs 6.1% for 1. In the 2x2 chance row, the half suji dealin is 5.5% compared to 7.5% for the 1. Why does this happen? For a terminal tile, a player may be waiting with a tanki, shanpon, or ryanmen wait. With a middle half suji tile, it is less common to be waiting with a tanki, kanchan, or shanpon wait, so most waits will be ryanmen. Therefore, blockers such as 1 chance or 2x2 chance are more effective at reducing the dealin rate of a half suji tile compared to a terminal tile.


Conclusion
Thanks for reading. You might have noticed the lack of push/fold in this post - I'll make a post in the future reviewing some of those situations. Not sure if I'll continue this type of log review or make smaller posts covering specific situations in the future. Let me know if there are any topics you want to see discussed!Popular posts from this blog
How to Measure Mahjong Luck and Skill

Every Game of Mahjong Is A Dice Roll Imagine you are playing a 4 player game of mahjong against 3 clones of yourself. The probability that you get 1st, 2nd, 3rd, or 4th place is 25% - you're all equal in skill and playing the same strategy, so there's no reason any clone would have an advantage. The average placement you would achieve is 2.50. If you were playing against weaker players and had an average placement of 2.40, we would say that you have some edge , or advantage. Now suppose you were playing perfect mahjong against competent opponents. How much edge is possible? One estimate of the maximum possible edge would be the results of the AI LuckyJ, who has the best performance of any person or AI in the Tokujou room on Tenhou. Over 1145 games, LuckyJ's spread of placements is 31.5% 1st, 27.5% 2nd, 24.1% 3rd, and 16.7% 4th. Its average placement is 2.26. There is some selection bias in estimating the edge of perfect play using the best performance we've seen...
Push Fold Fundamentals: Winrate/Dealinrate

Shoutout to hue for recommending Japanese resources and proofreading this post. Introducing The Win Dealin Ratio Your opponent declares riichi. Do you push a dangerous tile, or fold? Some players may refer to a flowchart (push good wait with X han), or a chart of expected values (EVs) to answer this question, but I think there’s a deeper understanding to be had. What is the math underlying these charts, and how can you modify your answer if parameters such as value, dealinrate, ability to fold/maneuver, or position change? I'm going to propose a heuristic that will help you answer push fold problems in a variety of circumstances. This is a concept that I borrowed from poker and modified for riichi mahjong. It’s a concept that is so important that I think about it in every game of mahjong that I play, and one that I wish I was formally taught as a beginner. It starts with a very simple idea: if I push, what percentage of the time will I win, and what percentage of the ti...
Mahjong Hand Reads: Irime Case 1

Opponent Call timings: Chii 2s => cut south Chii 2p (tsumogiri) => cut second 7p I had a pretty interesting South 4 push / fold decision recently, with the potential for an even more interesting set of reads. I'm going to start by analyzing the dealinrate of 7p (at the time it was pushed) and 1m , and then make a conclusion on the discard choice. Incentives Let's start by analyzing the all last incentives. Our competitor declares riichi from 1st place, temporarily dropping to 2nd place from the riichi stick cost. They declare riichi into two pretty threatening 1 call hands, suggesting that they have no yaku and a good wait. The dealer has called for a seeming honitsu hand in the dora suit, with a lot of suit overflow. The green dragon is live, and the red dragon and east are once cut. They cut 7p into the ippatsu turn risking last place, likely indicating tenpai with a valuable hand. With so many tiles in their suit cleared, the only remaining ryanmen is 14s. The dealer...
Comments
Post a Comment